How to Make a Sourdough Starter From Scratch
Two ingredients, about two weeks, and you'll have a living leavener that can raise bread for years.
A sourdough starter is nothing more than flour and water left to ferment until wild yeast and friendly bacteria move in and set up shop. Those microbes are what make sourdough rise and what give it that tangy, complex flavor. You don't need to buy anything special, borrow a jar from a friend, or track down a hundred-year-old heirloom culture. The yeast you need is already on your flour and floating around your kitchen. Your only job is to give it a comfortable place to multiply and a consistent feeding schedule.
Plan on 10 to 14 days from first mix to first loaf, though some starters wake up faster and some take three weeks. Each day asks for about five minutes of hands-on time. Once your starter is established, maintaining it takes a couple of minutes a day on the counter or a few minutes a week in the fridge.
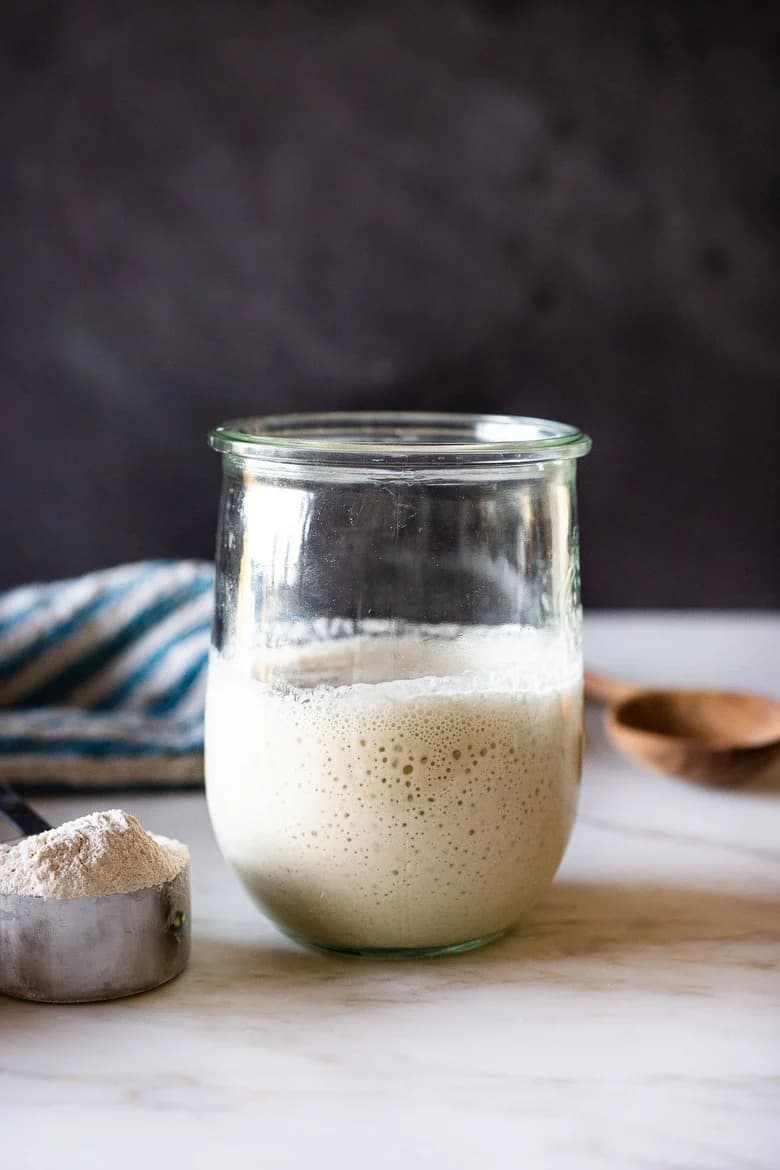
What You'll Need
- A clear glass jar or container, at least 1 quart, so you can see the bubbles and track the rise
- Whole wheat or rye flour for the first few days (these carry more wild yeast and minerals than white flour)
- Unbleached all-purpose or bread flour for ongoing feedings
- Filtered or bottled water, or tap water left out for an hour so the chlorine can off-gas
- A kitchen scale (volume measurements vary too much to be reliable here)
- A rubber band or dry-erase marker to mark the starter's level in the jar
- A loose lid, cloth, or coffee filter to cover the jar without sealing it airtight
A Note on Ratios and Temperature
Nearly everything in this process comes down to two variables: how much you feed and how warm you keep things. Feedings are described by weight in a flour-to-water-to-starter ratio. A 1:1:1 feeding means equal weights of existing starter, fresh flour, and water. That's the standard maintenance feed and the one you'll use most.
Temperature drives fermentation speed. Around 75 to 80°F is the sweet spot. In a cold kitchen your starter will feel sluggish and take longer to establish, which is normal and not a sign of failure. Good warm spots include the top of the refrigerator, inside an oven with just the light on, or a cupboard near a heat vent.
Days 1 Through 3: Getting Things Started
- 1On day 1, stir together 50g whole wheat or rye flour with 50g water in your jar until no dry flour remains. The texture should be like thick pancake batter.
- 2Cover loosely, mark the level on the jar, and leave it somewhere warm for 24 hours.
- 3On day 2, you may see a few bubbles or nothing at all. Both are fine. Stir it, cover it, and wait another 24 hours.
- 4On day 3, discard all but 50g of the mixture, then stir in 50g fresh flour and 50g water. From here on, this discard-and-feed pattern repeats.
Around day 3 or 4, many starters put on a dramatic show: lots of bubbles, a big rise, and a smell somewhere between cheese and gym socks. This is a false rise driven by bacteria that will die off shortly, not the yeast you're after. When the activity suddenly stops a day or two later, don't panic and don't throw it out. That lull is a normal stage in the process.
Days 4 Through 10: Building Consistency
- 1Feed once every 24 hours at roughly the same time of day. Discard all but 50g, then add 50g flour and 50g water.
- 2Start transitioning to all-purpose or bread flour if you like, either all at once or by mixing it half and half with the whole grain flour.
- 3Mark the level after each feeding so you can see how much it rises.
- 4Once the starter reliably doubles within 8 to 12 hours, switch to feeding twice a day, about 12 hours apart.
- 5Keep the twice-daily rhythm going until the rise becomes predictable, doubling in roughly the same window every time.
Discarding feels wasteful, and it is the part new bakers push back on most. But it serves a purpose: it keeps the ratio of food to microbes high enough that the yeast population can actually grow, and it keeps acidity from building to the point where fermentation stalls. You can collect discard in a jar in the fridge and bake with it rather than throwing it away, which is covered further down.
How to Tell When It's Ready
- It doubles in volume within 4 to 8 hours of feeding, consistently, over several days
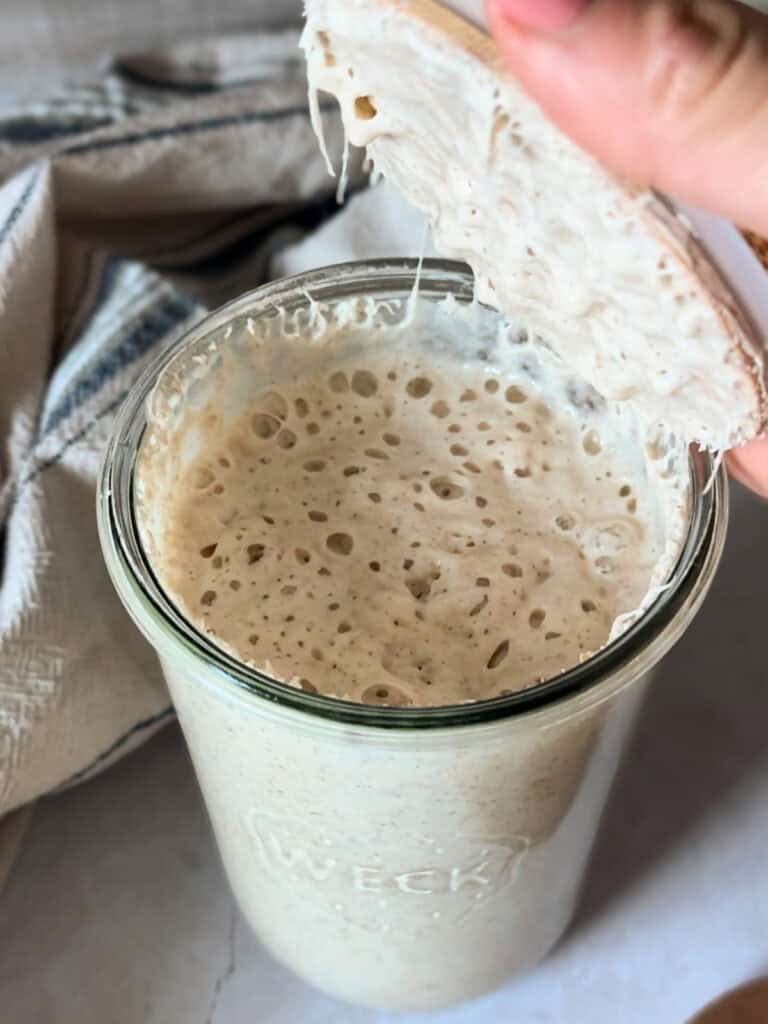
- The surface is domed and webbed with bubbles at peak, then flattens and sinks as it deflates
- The smell is pleasantly tangy and yeasty, like plain yogurt or beer, not sharply sour or like nail polish remover
- The texture is airy and stretchy rather than dense and soupy
- It passes the float test: a small spoonful dropped into room-temperature water floats instead of sinking (helpful, though not foolproof)
Consistency matters more than any single impressive rise. A starter that doubles once and then does nothing for three days isn't ready. One that doubles on schedule three or four days running is ready to raise bread.
Keeping Your Starter Alive
Once established, you have two options. If you bake several times a week, keep the starter at room temperature and feed it once or twice a day at a 1:1:1 ratio. If you bake less often, store it in the refrigerator and feed it once a week. Cold slows fermentation dramatically, so a fridge starter can go 10 days or more between feedings without real harm.
To bake with a refrigerated starter, take it out and give it one or two feedings at room temperature until it's rising and falling predictably again, then use it at peak. Plan for a day of lead time before a bake so it's fully awake.
Common Problems and What They Mean
- **A dark liquid on top (hooch):** your starter is hungry. Pour it off or stir it in, then feed more often or use a smaller amount of starter per feeding.
- **No activity after a week:** usually a temperature issue. Move it somewhere warmer and try switching to whole wheat or rye flour for a few feedings.
- **A smell like acetone or nail polish:** underfed and overly acidic. Feed twice daily at a 1:1:1 ratio for a few days, or feed with more flour and water relative to starter.
- **Pink, orange, or fuzzy growth:** this is genuine mold or bacterial contamination. Throw it out, wash the jar thoroughly, and start over. Healthy starter never grows fuzz or turns colors.
- **It rose beautifully and then stopped:** likely the day 3 or 4 false rise. Keep feeding on schedule and give it another week.
What to Do With Discard
Sourdough discard is unfed starter, which means it brings tang and tenderness to a batter without doing much leavening. Keep a jar of it in the fridge and pull from it for pancakes, waffles, crackers, banana bread, biscuits, and pizza dough. Most discard recipes take it straight from the fridge with no warming up required.
- Discard pancakes and waffles, mixed the night before for extra tang
- Crisp seeded crackers, spread thin and baked until snappy
- Quick biscuits or scones, where the acidity reacts nicely with baking soda
- Pizza and focaccia dough, using discard for flavor plus a little commercial yeast for lift
- Crumb topping and quick breads, where a half cup of discard slips in unnoticed
It's worth knowing that a healthy starter is the single piece of equipment behind nearly every sourdough microbakery. Once yours is reliable, one jar can produce loaves, focaccia, bagels, and discard crackers indefinitely, with an ingredient cost that stays remarkably low. That combination of low overhead and high perceived value is a big part of why sourdough is such a common first product for home bakers who start selling locally through farmers markets or platforms like Homebaked.
A Few Habits Worth Building
- Feed by weight, not volume, so your ratios stay consistent from day to day
- Mark the jar after every feeding so you're measuring actual rise, not guessing
- Keep a second small jar as a backup and store it in the fridge in case something happens to the main one
- Name your starter if you want, but don't get so attached that you're afraid to discard
- Give it time. Two weeks is normal, three weeks is not a failure, and a mature starter only gets stronger with age