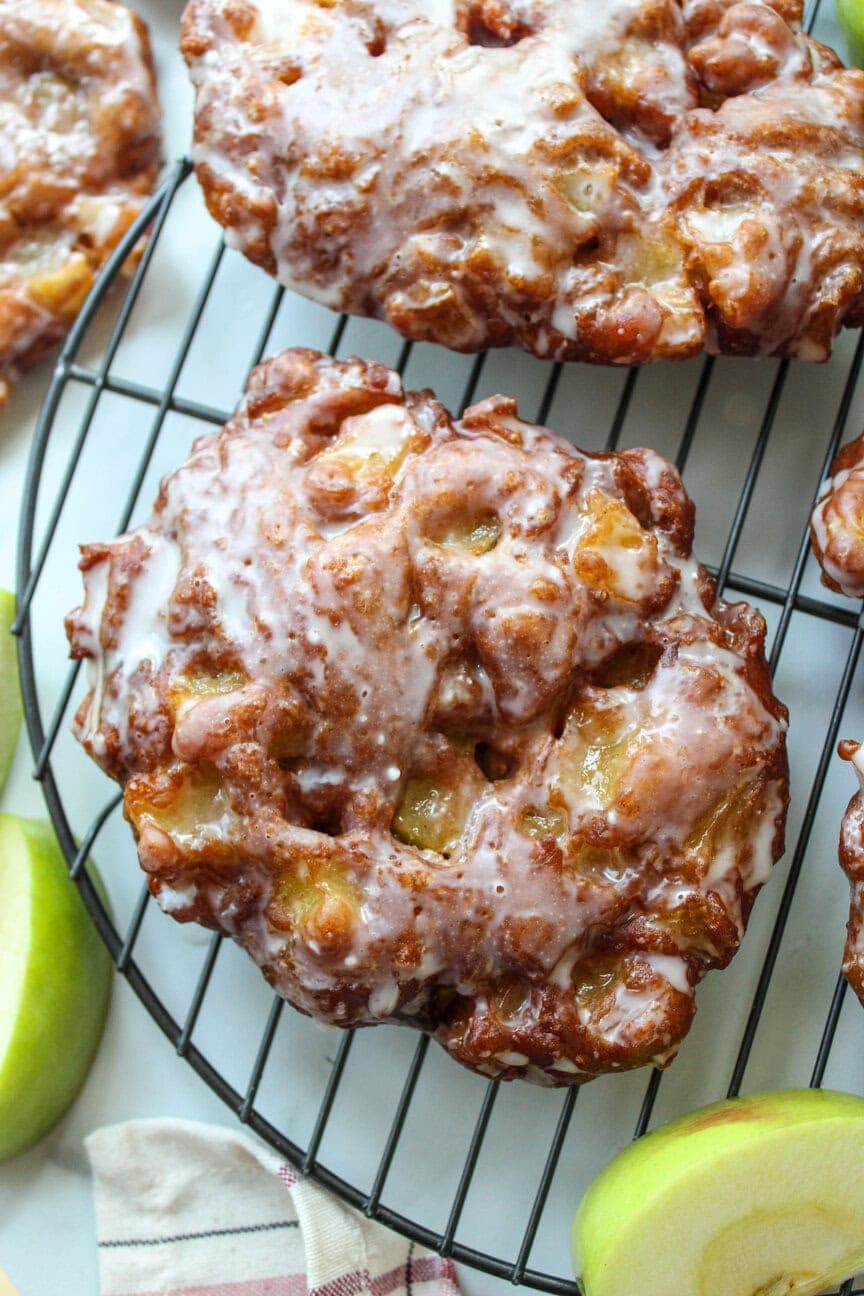
Glazed Apple Fritters, Gluten Free
Craggy, golden fritters loaded with cinnamon-spiced apple chunks and finished with a thin vanilla glaze that cracks when you bite in. No yeast, no rising time — batter to breakfast in under an hour.
Ingredients
Makes 12 fritters
Fritters
For Frying
Glaze
Instructions
- 1
Prep the apples
Peel and core the apples, then cut them into pieces roughly the size of a chickpea — about 1/4 inch. Bigger chunks stay raw and crunchy in the short fry time. Toss them with the lemon juice in a small bowl so they stay pale, and leave them there while you mix.
- 2
Whisk the dry ingredients
In a large bowl, whisk together the gluten-free flour blend, xanthan gum (skip it if your blend already lists gum in the ingredients), granulated sugar, baking powder, cinnamon, nutmeg, and salt. Whisk a good 30 seconds — gluten-free blends settle and clump more than wheat flour, and the gum needs to be dispersed evenly.
- 3
Combine the wet ingredients
In a separate bowl, whisk the milk, eggs, melted butter, and vanilla until smooth. Make sure the butter has cooled to just warm — if it's hot, it will scramble the eggs.
- 4
Mix and rest the batter
Pour the wet mixture into the dry and stir until smooth. Unlike wheat batter, you can't overmix this one, so beat out any lumps. Now cover the bowl and let it sit for 25 minutes. The rice flour and starches need that time to absorb liquid; skip it and you'll get a gritty, sandy texture. The batter will thicken noticeably as it rests.
- 5
Heat the oil
Toward the end of the rest, pour the oil into a heavy Dutch oven or deep pot to a depth of about 2 inches — never more than a third of the way up the sides. Clip on a thermometer and bring it to 365°F over medium heat. Set a wire rack over a rimmed baking sheet for draining.
- 6
Fold in the apples
Drain the apples well, discarding any pooled juice, and fold them into the rested batter. It should mound thickly on a spoon. If it's stiff enough to feel like paste, stir in milk a tablespoon at a time until it just drops from the spoon.
- 7
Fry in batches
Scoop a scant 1/4 cup of batter and lower it gently into the oil, nudging it off the spoon into a loose, craggy heap. Fry three or four at a time. Gluten-free fritters take slightly longer to set — figure 3 to 4 minutes per side, and look for a deep amber color rather than pale gold, which is the reliable doneness cue here.
- 8
Check and drain
Tear open the first fritter and check the center: it should be moist and custardy-soft but not wet or pasty. Gluten-free interiors read a touch denser than wheat ones even when fully cooked. Adjust your timing, move the batch to the wire rack, and let the oil return to 365°F before continuing.
- 9
Mix the glaze
Whisk the powdered sugar, milk, vanilla, and cinnamon until completely smooth and about as thick as heavy cream. Thin with a teaspoon of milk at a time if needed.
- 10
Glaze and set
Let the fritters cool about 5 minutes, then dip or spoon the glaze over each one and return it to the rack. Give them 10 to 15 minutes to set. These are best eaten the day they're fried — gluten-free fritters firm up faster in storage than wheat ones do.
You did it! Help us bring baking back home by selling your delicious baked goods on Homebaked!
Baker's Tips
- 1.
Firm, tart apples are the whole game here. Granny Smith, Braeburn, and Honeycrisp hold their shape and cut the sweetness of the glaze; softer varieties like McIntosh collapse into applesauce in the hot oil.
- 2.
Pat the diced apples dry before folding them in. Excess juice loosens the batter and makes fritters that spread flat instead of puffing.
- 3.
An instant-read or candy thermometer is worth more than any other tool for this recipe. Below 350°F the fritters drink oil; above 380°F the outsides brown before the middles cook.
- 4.
For extra-craggy edges, use two spoons and drop the batter in a deliberately messy shape rather than smoothing it. Those ragged bits fry up crisp and catch the most glaze.
- 5.
Glaze twice for a bakery-style finish: let the first coat set completely, then dip again. The second layer dries opaque and white.
- 6.
Strain and cool the frying oil, then store it in a sealed jar — it's good for another round or two of sweet frying.