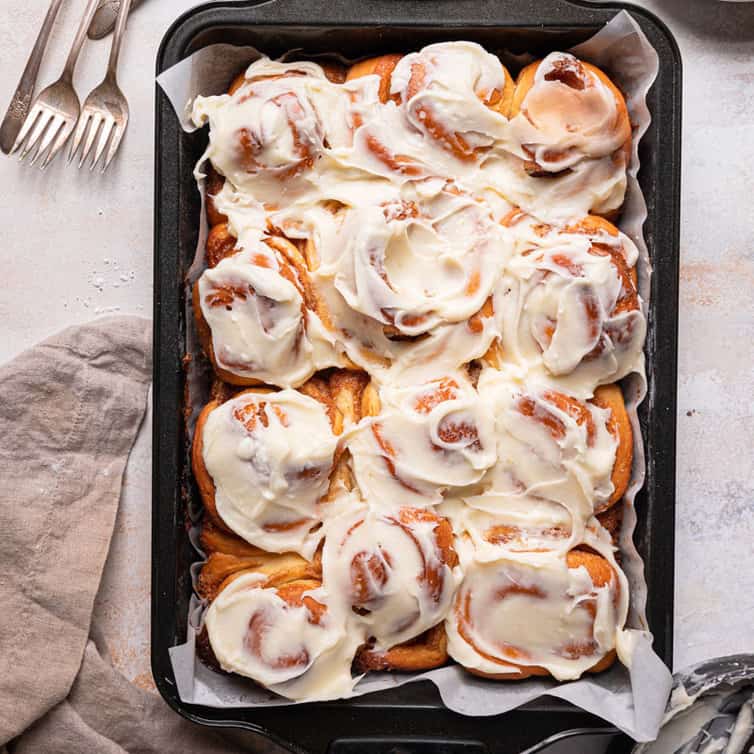
Classic Soft Cinnamon Rolls
Pillowy enriched dough wrapped around a dark brown sugar and cinnamon swirl, baked until the centers are barely set and finished with tangy cream cheese icing. This is the version worth setting an alarm for.
Ingredients
Makes 12 rolls
Dough
Filling
Cream Cheese Icing
Instructions
- 1
Wake up the yeast
Warm the milk until it feels like bathwater on the inside of your wrist, around 110°F. Anything hotter will kill the yeast, so use a thermometer if you are unsure. Stir the yeast and granulated sugar into the milk and let it sit for 5 to 10 minutes, until you see a foamy, creamy layer on top. No foam means the yeast is dead and you should start over with a fresh packet.
- 2
Mix the dough
Add the eggs, melted butter, salt, and 4 cups of the flour to the yeast mixture in a stand mixer bowl. Mix with the dough hook on low until no dry flour remains, about a minute, scraping the bottom of the bowl once.
- 3
Knead until smooth
Increase to medium-low and knead for 7 to 9 minutes. The dough should pull away from the sides of the bowl while still sticking slightly to the bottom, and should feel tacky but not gluey on your fingers. If it is still clinging to the sides after 5 minutes, add the remaining 1/4 cup flour a tablespoon at a time. Resist adding more than that, since extra flour is what turns these rolls dry and bready.
- 4
First rise
Shape the dough into a ball, set it in a buttered bowl, and cover. Let it rise somewhere warm for 60 to 90 minutes, until doubled. To test, press two floured fingers about half an inch into the dough; the dent should fill back in slowly rather than springing right back.
- 5
Make the filling
Beat the softened butter with the brown sugar, cinnamon, and salt until it forms a smooth, spreadable paste. Softened is the word that matters here, not melted. Melted butter runs out of the spiral during baking and pools at the bottom of the pan instead of staying put in the swirls.
- 6
Roll and fill
Butter a 9x13-inch pan. Turn the dough onto a lightly floured counter and roll it into a 16x12-inch rectangle, with a long side facing you. Spread the filling all the way to the edges except for a bare one-inch strip along the far long edge, and brush that strip with water.
- 7
Roll and cut
Starting from the long edge nearest you, roll the dough into a snug log, keeping the tension even as you go, then pinch the damp seam closed. Trim the ragged ends and cut the log into 12 equal pieces, about 1 1/4 inches each. Unflavored dental floss slid under the log and crossed over the top gives you clean rounds; a knife squashes them. Arrange cut side up in the pan with a little space between each.
- 8
Second rise
Cover the pan and let the rolls proof for 40 to 55 minutes, until puffy and touching each other. Around the 25-minute mark, heat the oven to 350°F. For an overnight bake, cover the shaped rolls and refrigerate up to 16 hours, then let them sit at room temperature for 45 to 60 minutes before baking.
- 9
Bake
Bake for 22 to 28 minutes, until the tops are golden and the centers register 190°F on an instant-read thermometer. If the edges are browning fast while the middle rolls still look pale, tent loosely with foil for the last 8 minutes. Pull them the moment the center is set, since a few extra minutes is the difference between gooey and dry.
- 10
Ice and serve
Beat the cream cheese and butter until completely smooth with no lumps, then add the powdered sugar, vanilla, milk, and salt and beat until fluffy. Let the rolls cool in the pan for about 10 minutes, then spread the icing over the warm tops so it half-melts into the crevices. Serve warm.
You did it! Help us bring baking back home by selling your delicious baked goods on Homebaked!
Baker's Tips
- 1.
Weigh your flour if you can. A cup scooped straight from the bag can carry 20 percent more flour than a spooned-and-leveled cup, and that alone is the most common reason homemade rolls come out tough.
- 2.
A cold kitchen slows the rise dramatically. Set the covered bowl inside your oven with only the light on, or next to a mug of just-boiled water, for a reliable warm spot.
- 3.
Dark brown sugar has more molasses than light, which gives the filling a deeper caramel note and a slightly gooier swirl. Light brown works, just expect a milder result.
- 4.
For extra soft sides, nestle the rolls close together with barely any gap. For crisper edges all around, give each roll more room in a larger pan.
- 5.
Save a spoonful of icing to add right before serving. The first layer soaks in, and the second stays glossy on top.
- 6.
Cinnamon varies wildly in strength. Freshly opened Vietnamese cinnamon is far more potent than a jar that has been in the cupboard two years, so taste the filling and adjust.
Equipment
- Stand mixer with dough hook (or sturdy bowl and hands)
- 9x13-inch baking pan
- Rolling pin
- Instant-read thermometer
- Unflavored dental floss or thin string
- Bench scraper
- Kitchen scale
Storage
Keep iced rolls covered at room temperature for up to 2 days, or refrigerated for up to 5 days. Warm individual rolls for 15 to 20 seconds in the microwave to bring back the soft texture. To freeze, wrap the cooled un-iced rolls tightly and freeze for up to 3 months; thaw overnight in the fridge, warm in a 300°F oven for about 12 minutes, then ice. Unbaked shaped rolls can also be frozen after slicing, then thawed and proofed in the pan for 2 to 3 hours before baking.