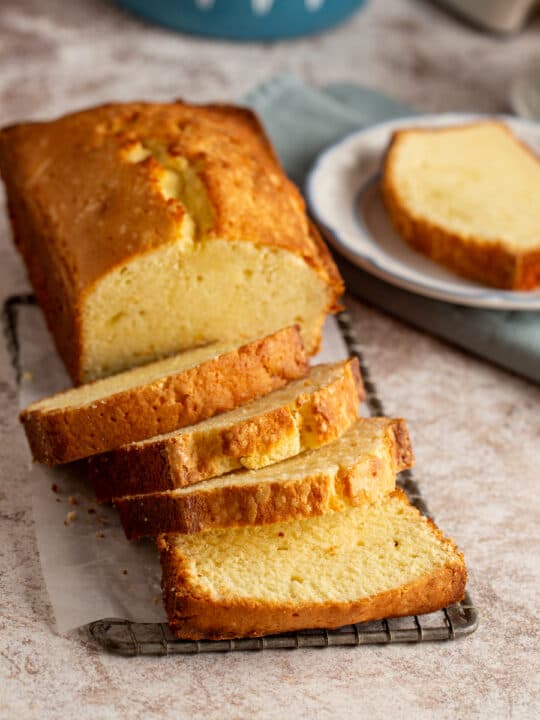
Classic Butter Pound Cake, Gluten Free
A dense, golden loaf with a buttery crumb and a crackled top, built on the old four-ingredient formula with just enough sugar and milk to keep it moist. It slices clean, keeps for days, and tastes like it came from a very good bakery.
Ingredients
Makes 1 loaf (12 slices)
Cake
To finish
Instructions
- 1
Heat the oven and prep the pan
Set a rack in the center of the oven and heat it to 325°F. Butter a 9x5-inch metal loaf pan, then line it with a strip of parchment that hangs over the two long sides so you can lift the cake out later. Butter the parchment too. The low oven is deliberate: this is a tall, heavy batter, and a hotter oven sets the crust long before the middle catches up.
- 2
Get everything to room temperature
Press a finger into the butter. It should dent easily but still hold its shape, around 65 to 67°F. Greasy, melty butter will not hold air, and cold butter will not either. The eggs and milk should feel cool-neutral, not fridge-cold. If your eggs are straight from the fridge, sit them in a bowl of warm tap water for 10 minutes.
- 3
Cream the butter and sugar properly
Beat the butter alone with a paddle on medium speed for about a minute until it's smooth and glossy. Add the sugar in a steady stream, then beat on medium-high for 5 to 7 full minutes, stopping twice to scrape the bowl and paddle. You're looking for a mixture that has gone almost white and climbed noticeably up the sides of the bowl. This is where nearly all the lift in a pound cake comes from, so don't shorten it.
- 4
Add the eggs slowly
Whisk the eggs with the vanilla in a measuring cup with a spout. With the mixer on medium, pour them into the butter in a thin, patient stream over 3 to 4 minutes. Rushing here is the classic way to break the batter. If it does look curdled and separated, add 2 tablespoons of the measured flour blend and beat for 30 seconds; it will usually pull back together.
- 5
Fold in the dry ingredients
Whisk the gluten-free blend, xanthan gum, baking powder, and salt together in a separate bowl so the gum is evenly dispersed and can't form slippery lumps. Add about a third to the batter and fold it in with a flexible spatula, then repeat in two more additions and fold in the milk. Stop as soon as it looks uniform. Xanthan gum turns rubbery and gummy if you keep working the batter, so this is one place where under-mixing beats over-mixing.
- 6
Rest the batter
Scrape the batter into the prepared pan, smooth the top, and let it sit on the counter for 25 to 30 minutes before baking. Rice flour and starches absorb liquid far more slowly than wheat flour, and this rest is what prevents the gritty, sandy texture that gluten-free cakes are known for. The batter will look slightly thicker and less shiny when it's ready.
- 7
Score the top and bake
Run the back of a wet spoon down the length of the batter to encourage a center split, then bake for 65 to 80 minutes. Gluten-free loaves typically need 5 to 10 minutes longer than wheat versions and they brown faster, so tent with foil at 45 minutes if the top is getting dark. Rely on the thermometer here rather than color: 205 to 210°F in the center, with a skewer that comes out free of wet batter.
- 8
Cool completely before slicing
Rest the cake in the pan for 20 minutes, then lift it out by the parchment and cool it fully on a rack, at least 2 to 3 hours. Gluten-free crumb is fragile and still setting while warm, and slicing early will tear it. Dust with powdered sugar just before serving and cut with a long serrated knife.
You did it! Help us bring baking back home by selling your delicious baked goods on Homebaked!
Baker's Tips
- 1.
This cake is genuinely better on day two. The crumb tightens, the butter flavor deepens, and it slices far more cleanly.
- 2.
Weigh your flour if you can. A heavy-handed cup can add 20 to 30 grams, which is the difference between a tender loaf and a dry one.
- 3.
If your kitchen is cold, the creamed mixture can stiffen and refuse to take the eggs. Warm the outside of the bowl with a hot towel for 20 seconds and keep going.
- 4.
For a lemon version, rub 2 teaspoons of lemon zest into the sugar with your fingertips before creaming. The abrasion releases far more oil than simply stirring it in.
- 5.
A glass or dark metal pan runs hotter. Drop the oven to 315°F and start checking at 55 minutes.
- 6.
Leftover slices are excellent griddled in a little butter for 90 seconds a side, then topped with macerated berries.